Overview
You’d like to learn to run Python in a Jupyter session. Here we will cover:
- Installing Python in Jupyter
- Running Python code in Jupyter
- Saving your notebook and exiting
Prerequisites
| Concepts | Importance | Notes |
|---|---|---|
| Installing and Running Python | Helpful |
- Time to learn: 20 minutes
Installing Python in Jupyter
To run a Jupyter session, you will need to install some necessary packages into your Conda environment.
Install miniforge by following the instructions for your machine.
Next, create a Conda environment with Jupyter Lab installed. In the terminal, type:
$ conda create --name pythia_foundations_env jupyterlabTest that you have installed everything correctly by first activating your environment and then launching a Jupyter Lab session:
$ conda activate pythia_foundations_env
$ jupyter lab
A new window should open automatically in your default browser. You can change the browser when launching from the terminal with (for example):
jupyter lab —browser=chromeRunning Python in Jupyter
With your Conda environment activated and Jupyter session launched (see above), create a directory to store our work. Let’s call it
pythia-foundations.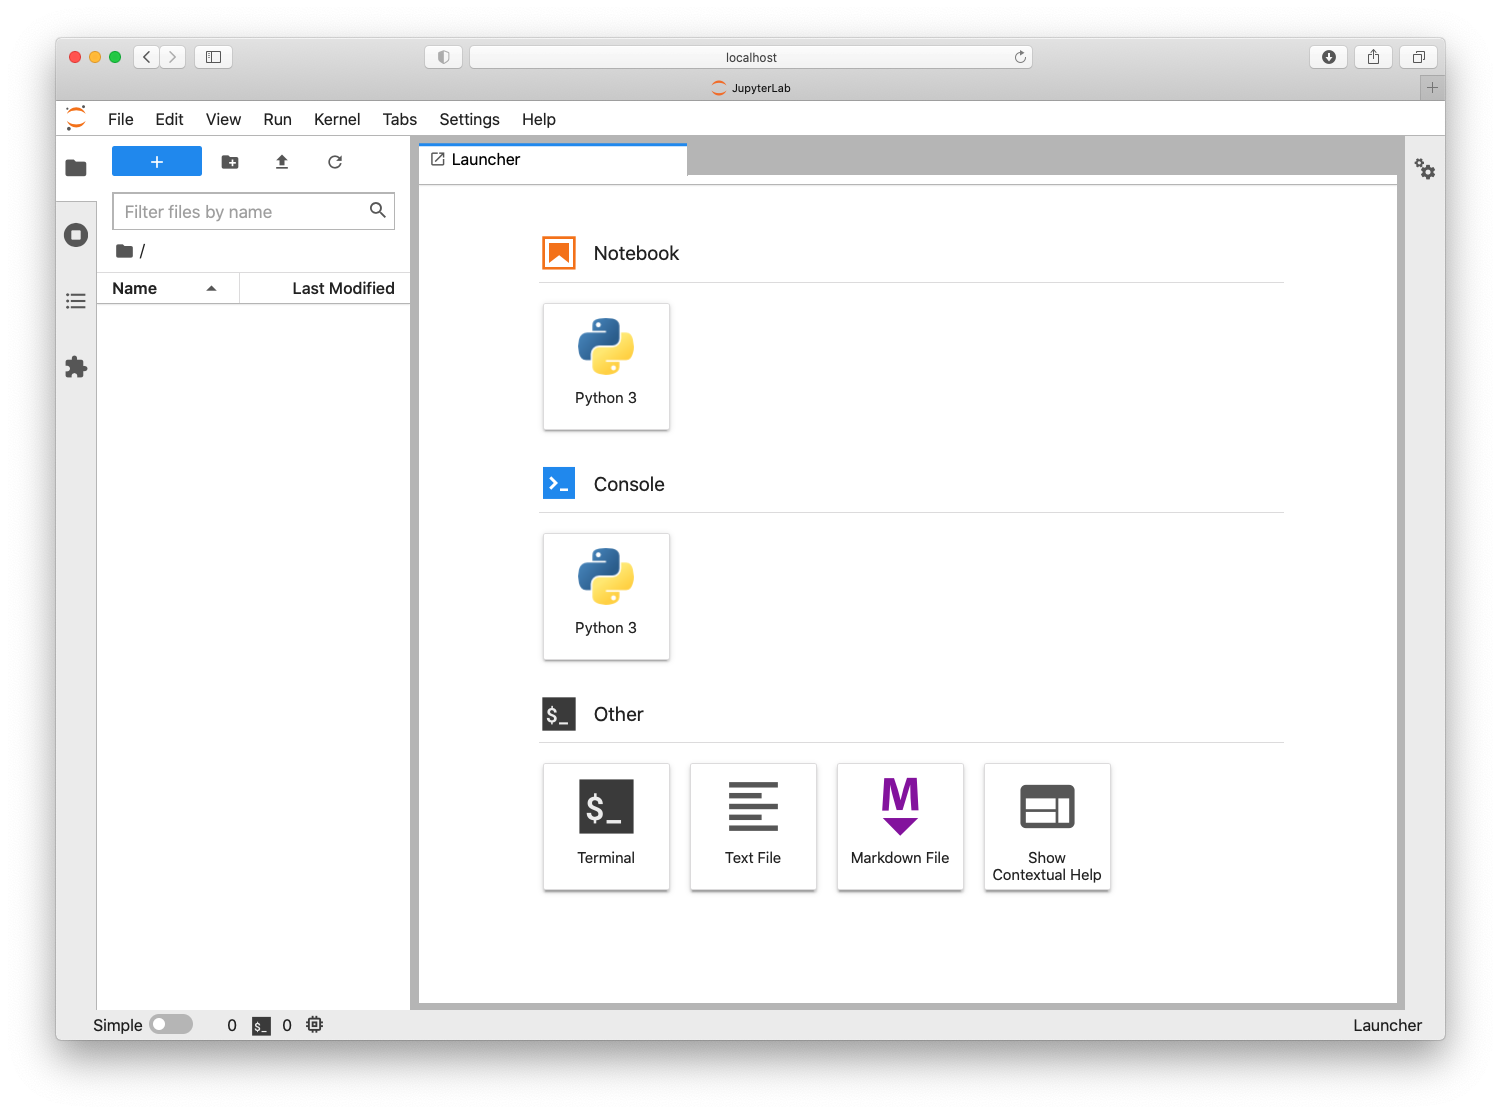
You can do this in the GUI left sidebar by clicking the new-folder icon. If you prefer to use the command line, you can access a terminal by clicking the icon under the “Other” heading in the Launcher.
Create a new
mysci.ipynbfile within thepythia-foundationsfolder:Do this in the GUI on the left sidebar by clicking the “+” icon.
This will open a new launcher window where you can select a Python kernel under the “Notebooks” heading for your project. You should see “Python 3” as in the screenshot above. Depending on the details of your system, you might see some additional buttons with different kernels.
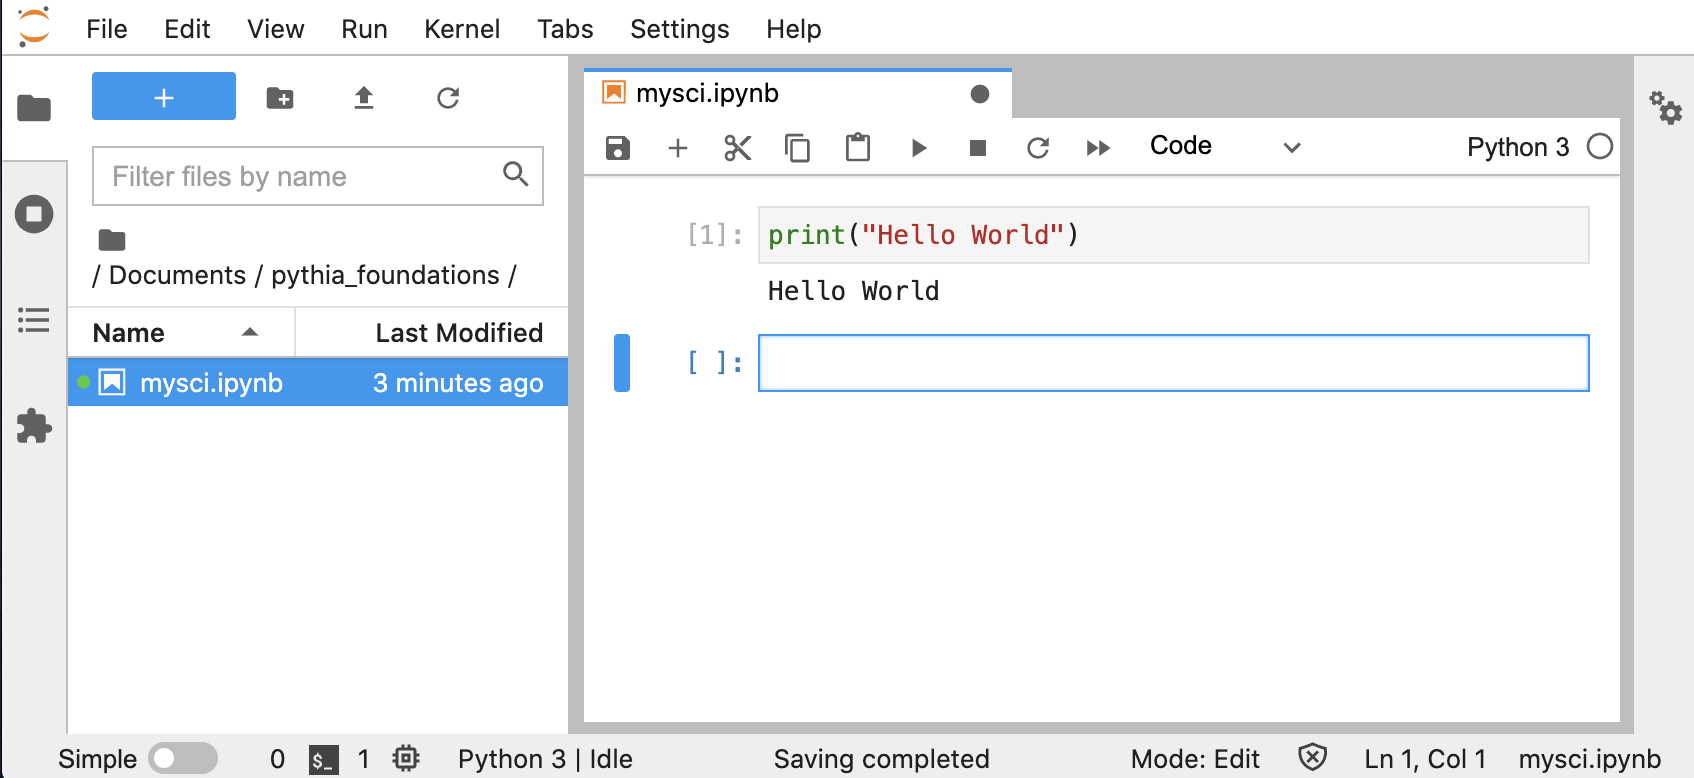
Selecting a kernel will open a Jupyter notebook instance and add an untitled file to the left sidebar navigator, which you can then rename to
mysci.ipynb.Select “Python 3” to use the Python version you just installed in the
pythia_foundations_envconda environment.Change the first notebook cell to include the classic first command: printing, “Hello, world!”.
print("Hello, world!")Run your cell with Shift+Enter and see that the results are printed below the cell.
Congratulations! You have just set up your first Python environment and run your first Python code in a Jupyter notebook.
Info
There are a few code-syntax differences between running Python in a Jupyter notebook and a script:In a Python script, to print a variable to the terminal, you need to call
print([THING YOU WANT TO PRINT]), whereas in Jupyter, you can simply have the last line of a code cell be[THING YOU WANT TO PRINT].Similarly with plots, in Python, you have to call
plt.show()to display your plot, but plots are shown automatically in Jupyter.
Saving your notebook and exiting
When you are done with your work, it is time to save and exit.
To save your file, you can click the disc icon in the upper left Jupyter toolbar or use keyboard shortcuts.
Jupyter allows you to close the browser tab without shutting down the server. When you’re done working on your notebook, it’s important to click the “Shutdown” button on the dashboard to free up memory, especially on a shared system.
Then you can quit Jupyter by:
- clicking the “Quit” button on the top right, or
- typing
exitinto the terminal
Alternatively you can simultaneously shutdown and exit the Jupyter session by typing Ctrl+C in the terminal and confirming that you do want to “shutdown this notebook server.”
Summary
Jupyter notebooks are a free, open-source, interactive tool running inside a web browser that allows you to run Python code in “cells.” To run a Jupyter session you will need to install jupyterlab into your Conda environment. Jupyter sessions need to be shutdown, not just exited.