Overview
JupyterLab is a popular web application on which users can create and run their Jupyter Notebooks, as well as explore data, install software, etc. You interact with JupyterLab through a web browser, and the interface is the same whether the JupyterLab session is running locally on a laptop, or remotely by logging into a JupyterHub.
This section will give you a basic orientation to features of JupyterLab, including:
the JupyterLab interface
how to open a command line Terminal within JupyterLab
basic Python code execution in a console within JupyterLab
how to use the text editor within JupyterLab
The next chapter will then discuss creating, editing, and executing a Jupyter Notebook within JupyterLab.
Prerequisites
| Concepts | Importance | Notes |
|---|---|---|
| Jupyter Components | Helpful | |
| Installing and Running Python: Python in Jupyter | Helpful |
Set up
To launch the JupyterLab interface in your browser, follow the instructions in Installing and Running Python: Python in Jupyter.
If, instead, you want to follow along using a provided remote JupyterLab instance, launch this notebook via Binder using the launch icon at the top of this page,

and follow along from there! If launching Binder, take note of the Launcher tab in the upper-left (see interface below). Click there to find yourself in the same interface moving forward, and feel free to refer back to this tab to follow along.
The JupyterLab interface
Go to your browser and take a look at the JupyterLab interface.
With a base installation of JupyterLab your screen should look similar to the image below.
Notice:
The Menu Bar at the top of the screen, containing the typical dropdown menus: “File”, “Edit”, “View”, etc.
Below that is the Workspace Area (currently contains the Launcher).
The Launcher is a quick shortcut for accessing the Console/Terminal, for creating new Notebooks, or for creating new Text or Markdown files.
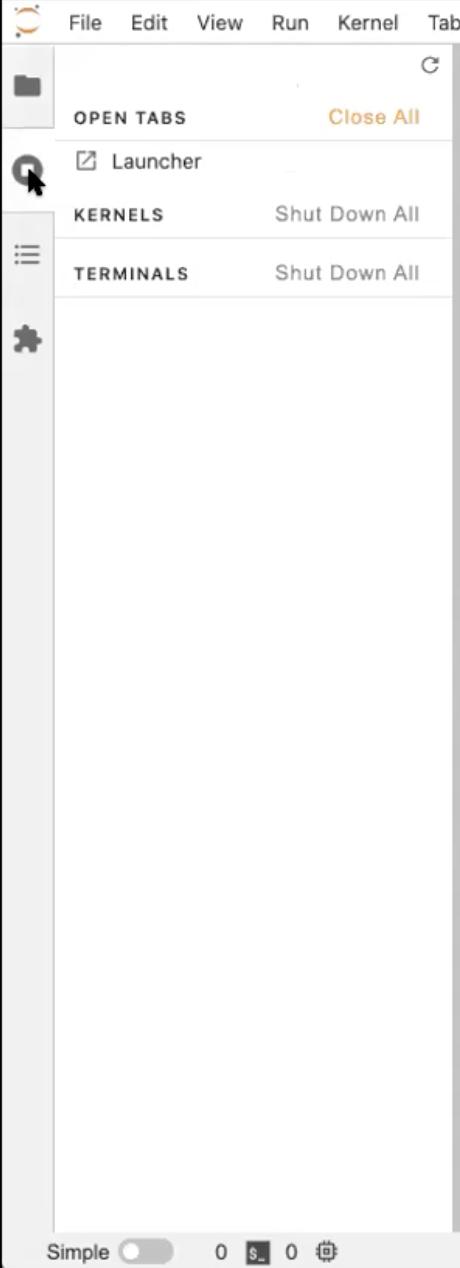
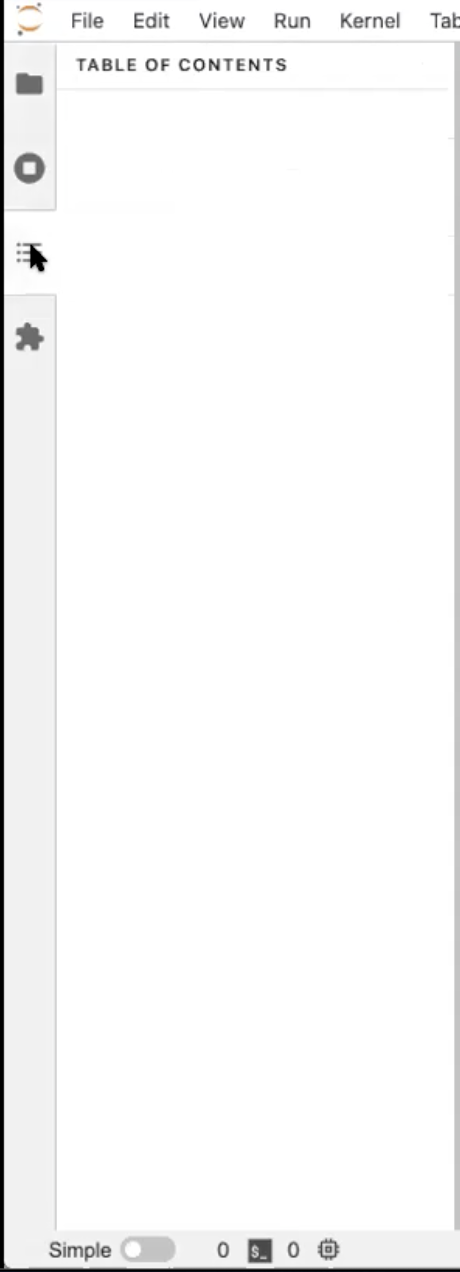
On the left is a Collapsible Sidebar. It currently contains the File Browser, but you can also select the Running Tabs and Kernels, the Table of Contents, and the Extensions Manager.
Below everything is the Information Bar, which is context sensitive. We will touch on this more.
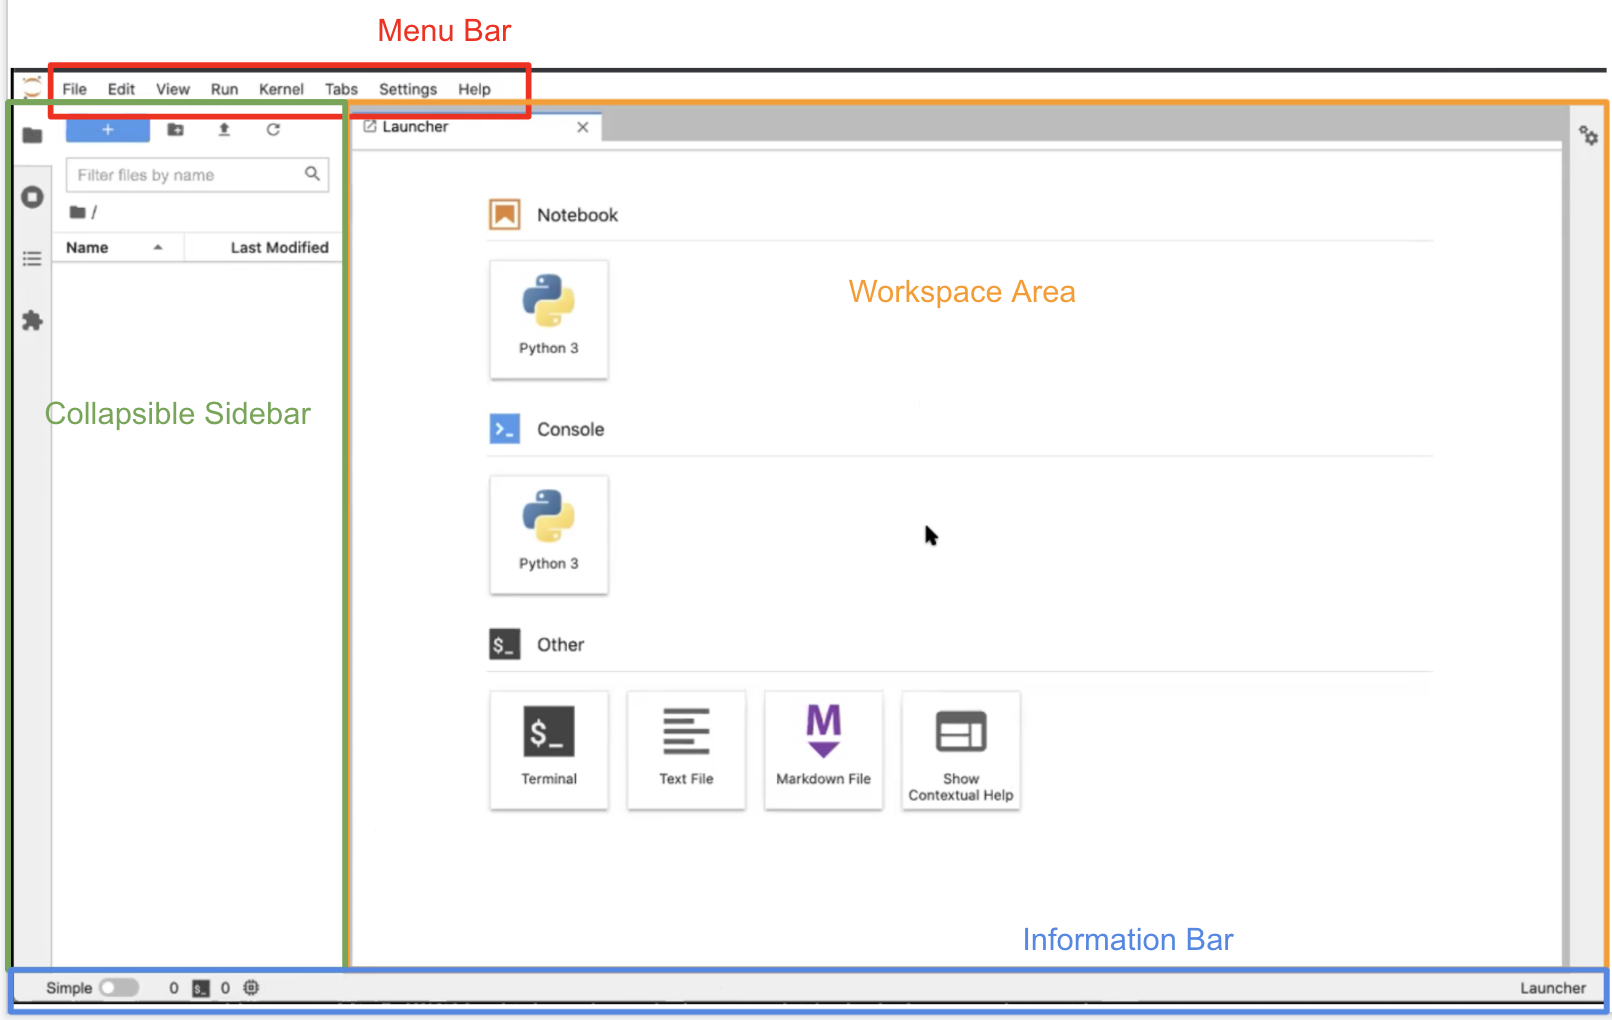
We will now take a closer look at certain aspects and features of the JupyterLab Interface.
Left sidebar
The Collapsible Left Sidebar is open to the File Browser Tab at launch. Clicking the File Browser Tab will collapse the sidebar or reopen it to this tab.
Within this tab, you will see the “+” button, which allows you to create a new launcher.
Next to that is the “+ folder” button which allows you to create a new folder that then appears below “Name” in the contents of your directory. Double click the folder to enter it, right click the folder for options, or press the “root folder” icon to return to the root directory. The root directory is the directory from which JupyterLab was launched. You cannot go above the root directory.
The “upload” button (looks like an arrow pointing up) allows you to upload files to the current folder.
The “refresh” button refreshes the File Browser.
Below the File Browser Tab is the Running Tabs and Kernels Tab. Currently, this tab doesn’t have much in it. We will revisit this when we have running kernels. Kernels run as background processes, so closing a tab (Terminal or Notebook) doesn’t shut down the kernel. You have to do that manually.
The Table of Contents Tab is auto-populated based on the headings and subheadings used in the Markdown cells of your notebook. It allows you to quickly jump between sections of the document.
Last is the Extensions Manager Tab where you can customize or enhance any part of JupyterLab. These customizations could pertain to themes or keyboard shortcuts, for example. We will not be covering JupyterLab extensions, but you can read more about them here.

Terminals and Python consoles
Here we’ll discuss two simple ways we can interact with the host system (which may be our own laptop, or may be a remote host running JupyterHub): terminals and consoles.
Terminals
Let’s select the Running Tabs and Kernels Tab in the Left Sidebar and see how it changes when we’ve used the Launcher.
Open a Terminal in the Launcher. It should look very similar to the desktop terminal that you initially launched JupyterLab from, but is running from within JupyterLab, within your existing conda environment, and within the directory you launched JupyterLab from (the same root folder shown in the File Browser Tab). Notice that there is now a Terminal listed in the Running Terminals Tab.
In the terminal you can use your usual terminal commands. For example, in the terminal window, run:
$ mkdir testSelect the File Browser Tab, refresh it, and see that your new folder is there.
In the Terminal Window run:
$ rmdir testHit refresh in the File Browser again to see that the directory is gone.
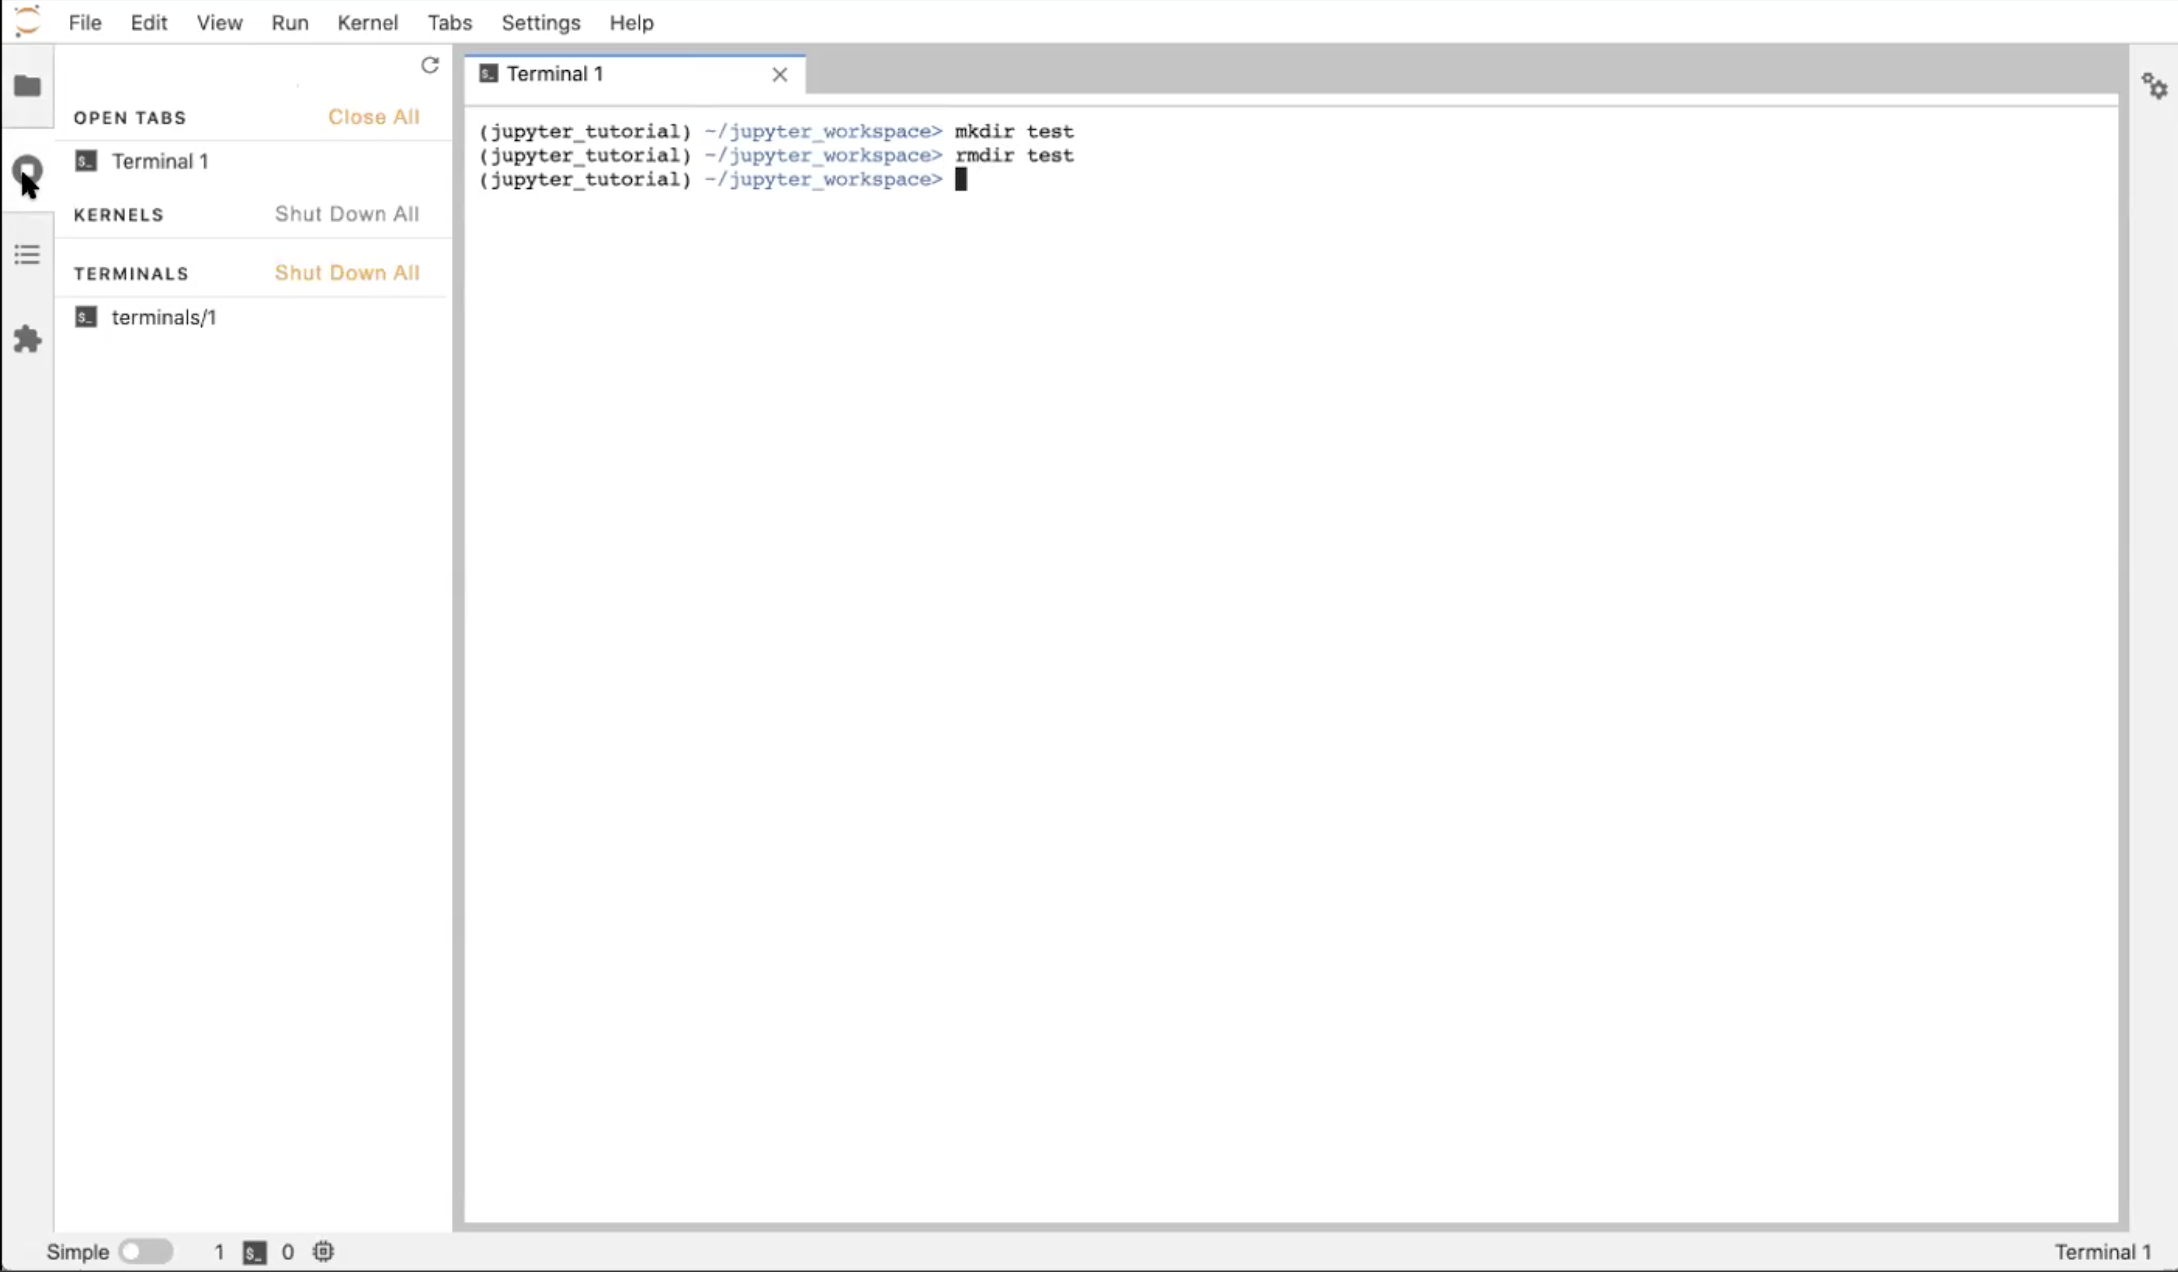
Back with the Running Terminals and Kernels Tab open, click the “X” in your workspace to close the Terminal window. Notice that the Terminal is still running in the background! Click on the terminal in the Running Terminals and Kernels Tab to reopen it (and hit enter or return to get your prompt back). To truly close it, execute in the Terminal window:
$ exitOR click the “X” shut down button in the Running Terminals tab.
Doing so will return you to the Launcher.
Consoles
A console is similar to a terminal, but instead of running system-level commands, we are working directly in a Python interpreter.
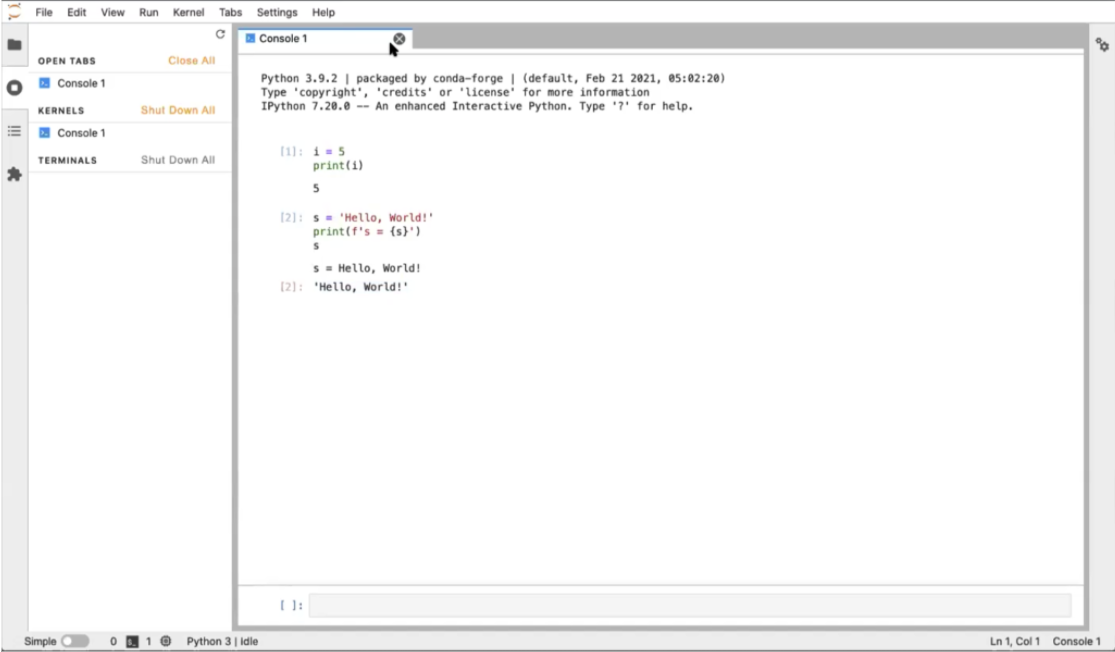
Back in the Launcher, click the “Python 3” Console button. There is only one console option right now, but you could install more kernels into your conda environment.
There will be three dots while the kernel starts, then what loads looks like an IPython console. This is a place to execute Python commands in a stand alone workspace which is good for testing. Notice that the kernel started in the Running Terminals and Kernels tab!
Start in a “cell” at the bottom of the Console window. Type:
i = 5
print(i)
To execute the cell, type Shift+Enter. Notice that the console redisplays the code you wrote, labels it with a number, and displays (prints) the output to the screen.
In the next cell, enter:
s = 'Hello, World!'
print(f's = {s}')
s
The first line of this code designates a string s with the value “Hello, World!”, the second line uses f-formatting to print the string, and the final line just calls up s. The last line in the cell will always be returned (its value displayed) regardless of whether you called print. Type Shift+Enter to execute the cell. Again the output is labeled (this time with a 2), and we see the input code, the printed standard-out statement, and the return statement. The “return value” and the values “printed to screen” are different!
Close the window and shut down the Console in the Running Kernels tab. We’re back to the Launcher again.
Text editor
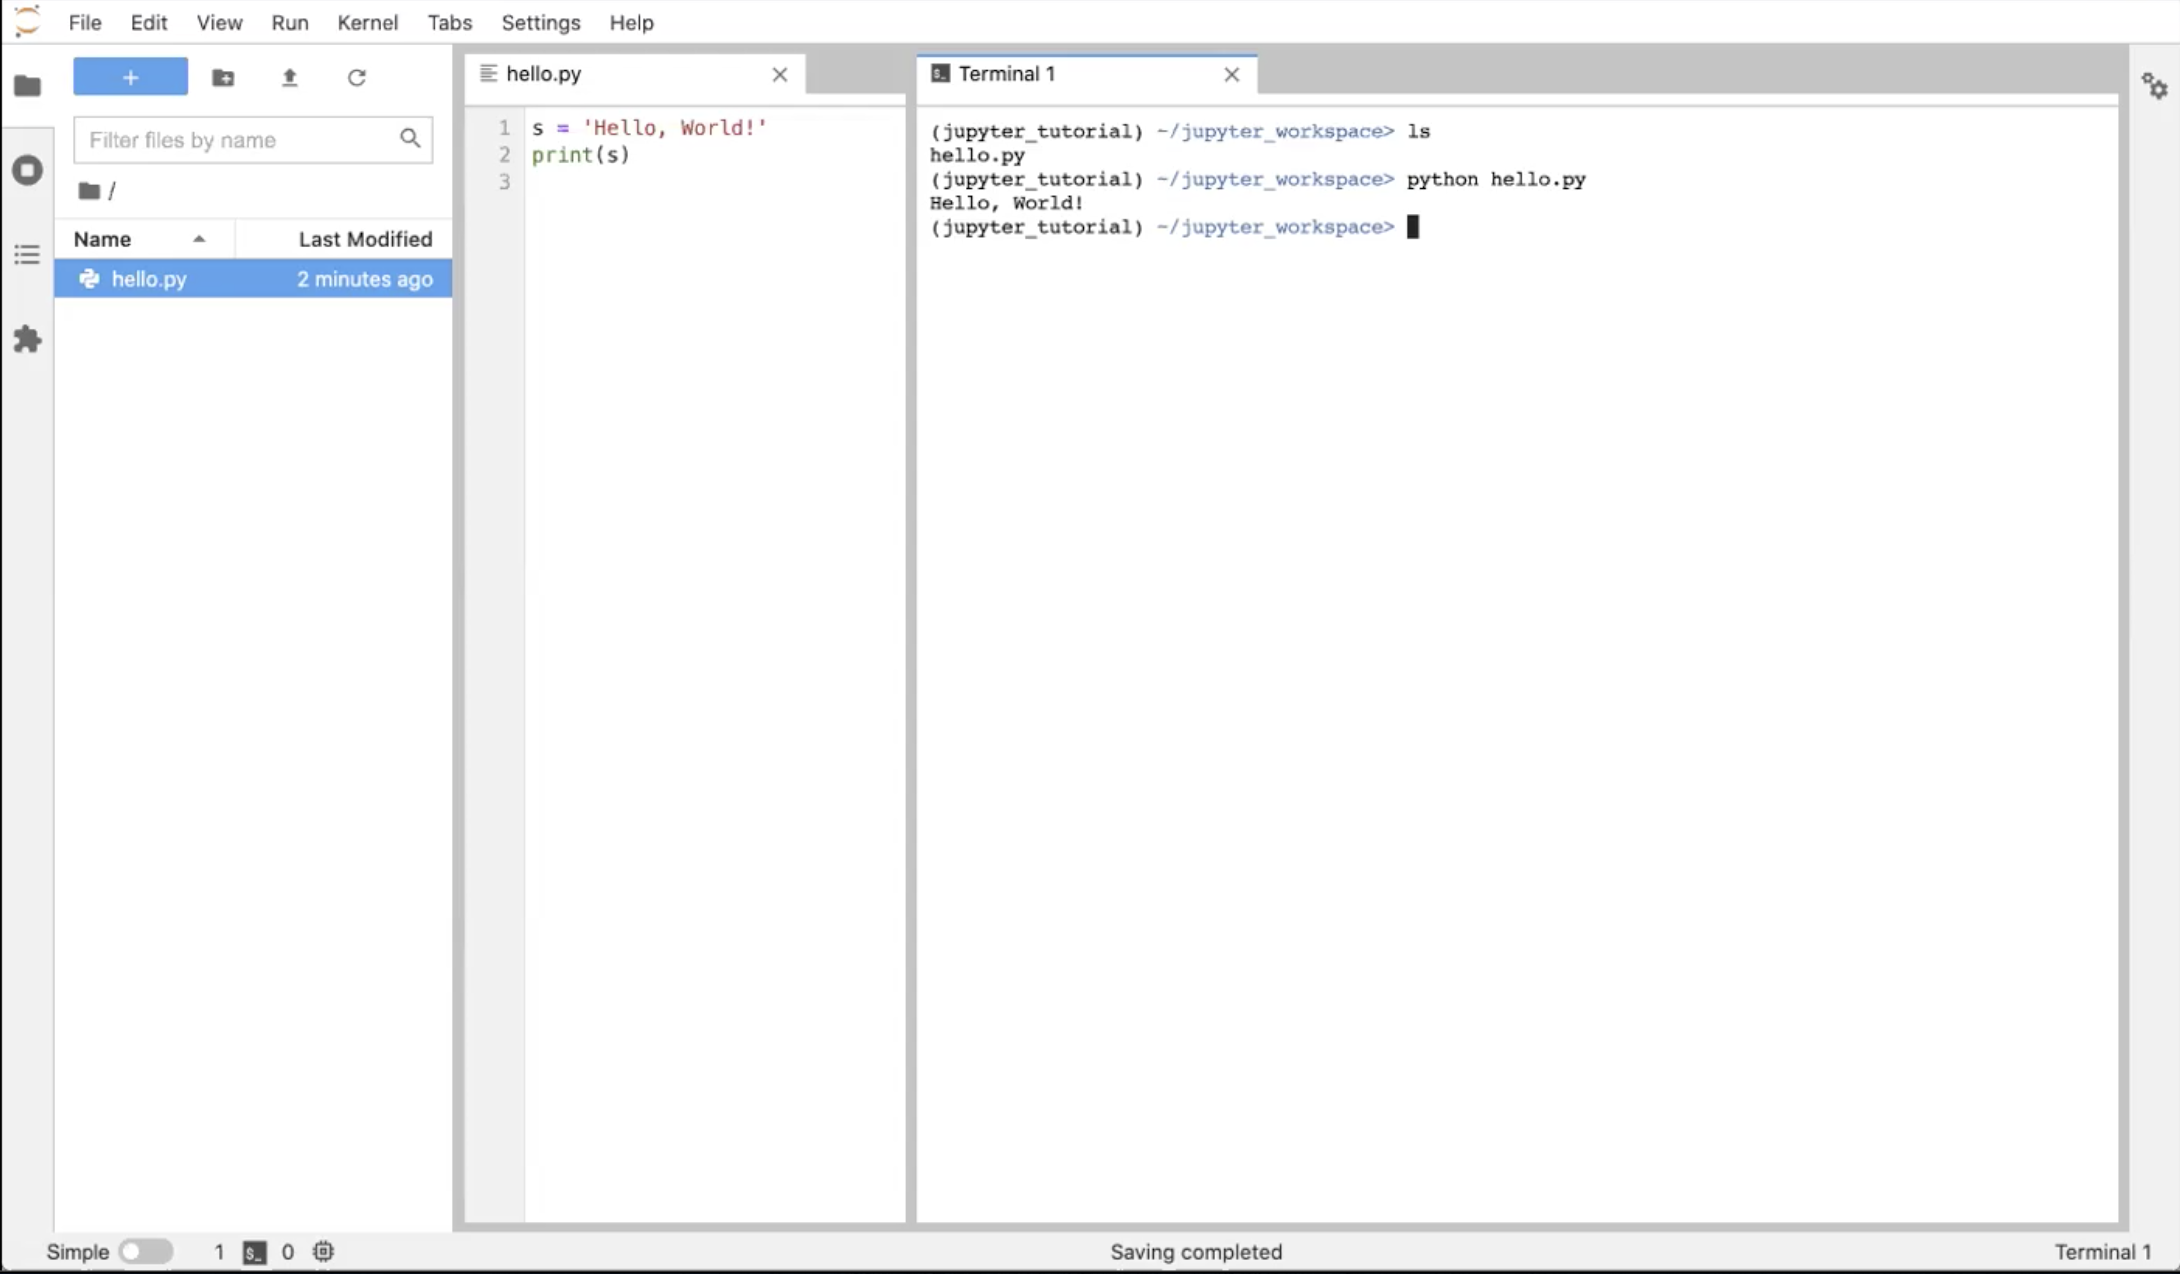
Click on the “Text File” button in the Launcher.
Select the File Browser tab to see the new file untitled.txt you created.
Enter this Python code into the new text file:
s = 'Hello, World!'
print(s)
You may notice that the file has a dot instead of an “X” where you’d close it. This indicates that the file hasn’t been saved or has unsaved changes. Save the file (“command+s” on Mac, “control+s” on Windows, or “File ▶ Save Text”).
Go to the File Browser tab, right-click the new file we created and “Rename” it to hello.py. Once the extension changes to .py, Jupyter recognizes that this is a Python file, and the text editor highlights the code based on Python syntax.
Now, click the “+” button in the File Browser to create a new Launcher. In the Launcher tab, click on the “Terminal” button again to create a terminal. Now you have 2 tabs open: a text editor tab and a terminal tab. Drag the Terminal tab to the right side of the main work area to view both windows simultaneously. Click the File Browser tab to collapse the left sidebar and get more real estate! Alternatively, you could stack the windows one on top of the other.
Run ls in the Terminal window to see the text file we just created. Execute python hello.py in the Terminal window. See the output in the Terminal window.
Now, let’s close the Terminal tab and shut down the Terminal in the Running Kernels tab (or execute “exit” in the Terminal itself). You should just have the Text editor window open; now we’re ready to look at Jupyter Notebooks.
Summary
You are now familiar with the JupyterLab interface, including and how to access the terminal, Python console, and text editor from within JupyterLab.
The terminal is especially useful for running commands on the remote host when logged in to a JupyterHub. The console is a useful place to test new code. The text editor is useful for creating and editing files directly on the remote host.
What’s next?
Now we’re ready to dive into the most powerful feature of JupyterLab: creating and running Jupyter Notebooks.